December 8, 2014

Festive Advent


Happy Holidays! I hope all of my readers are having a great holiday season. I am so glad I actually had time to jump in and get my Silhouette Challenge done for this month. It was a very close call with everything I have going on lately.

Some pearls are missing because I have a curious toddler. 
This months project is something that I want to pass down as a tradition to my daughter. When I was very young my mom would always buy all of us kids an advent calendar. It was nothing fancy, just the nice little cardboard boxes with flap doors to reveal chocolate candy. The memory of it has held on and is something I do find wonderfully nostalgic. Last year my little one was much too young to really enjoy the festivities or candy for that matter.

Now that she is older we are so excited to share in the holiday fun with her. So with this project I decided to make the advent calendar and make it something very special for both of us. Now, this was not as easy as I believed it would be.  I am positive I made it more difficult for myself than I should have. But that is the point of the challenge, right?


I used a thicker card stock, not sure of the weight because it was pieces in my paper box. I made the design myself in the Silhouette software. It is like a lift top box style with flap doors that are perforated around the edges. I then embellished them with large, easy to read numbers and a little bow with a pearl on top.


My daughter thinks it is "pwettyyy!" and is very excited for her "bite!", everyday. We also work on getting her to say the number on the front, so far she has gotten to number 5, but I don't push it. It's just so much fun to watch her get so excited to open it up and be as excited as I was. These are the moments to cherish with her!


Over the year I will be making a new one surely with new materials that are sturdier and will hold up for years to come. Have a wonderful Holiday Season and Happy New Year! - Alisha


Make sure to check out these amazing projects by our other Silhouette Challenger Bloggers. As well enter for a chance to win a Cameo or Portrait of your very own!


Want to Check Out More Silhouette Projects?

My Silhouette Challenge buddies and I are all sharing projects on our blogs today, so peruse the projects below for a wealth of Silhouette inspiration!


Reinvented Elf on a Shelf Book Cat-Shaped Ornament Stamped Christmas Towels M&M Milk Bottle Teacher Gift 3D Holly Berry Ornament Deer Silhouette Mirror Silhouette Christmas Craft with Double-Sided Adhesive Winter Village Display Wood Grain Nativity DIY Rustic Pallet Christmas Tree 2014 Christmas Card + Giveaway Gift Tags Chalkboard Vinyl Christmas Signs Personalized Christmas Ornament DIY Wood Slice Christmas Ornaments DIY Nativity Candle Jar Sleeve Chalkboard Charger Inspiration + Giveaway Christmas Countodwn Festive Advent Christmas Decor AND A Giveaway! All Hearts Go Home Luminarias DIY Christmas Coasters Vinyl Wood Slice Ornaments Some People are Worth Melting For Olaf (Frozen Inspired) Ornament Personalized Pajamas with HTV 3D Reindeer Shield Decoration Trendy Christmas Cards with Silhouette + Free Cut Files Let It Snow Mitten Banner Deer Silhouette Elf on the Shelf Wardrobe Simple Ornaments Stenciled Santa Sack Put on your Yamika! Reindeer Photo Ornament Christmas Card DIY Nativity Shadowboxes Monogrammed Drop Cloth Christmas Tree Skirt Canvas Wall Art for the Holidays

1. Pineapples and Pinecones // 2. Simply Kelly Designs // 3. Architecture of a Mom // 4. Just a Girl and Her Blog // 5. Two Purple Couches // 6. Chicken Scratch NY // 7. Creative Ramblings // 8. One Dog Woof // 9. Ginger Snap Crafts // 10. The Thinking Closet // 11. Please Excuse My Craftermath... // 12. Designer Trapped in a Lawyer's Body // 13. weekend craft // 14. Dragonfly & Lily Pads // 15. Practically Functional // 16. Living My Given Life // 17. My Paper Craze // 18. The Kim Six Fix // 19. Home At Eight // 20. Queen of Everything // 21. Tried & True // 22. Mama Sonshine // 23. unOriginal Mom // 24. Create it. Go! // 25. From Wine to Whine // 26. GetSilvered // 27. It's Always Ruetten // 28. Nearly Handmade // 29. McCall Manor // 30. Silhouette School // 31. It Happens in a Blink // 32. Create & Babble // 33. Sowdering About // 34. Where The Smiles Have Been // 35. My Favorite Finds // 36. Lil' Mrs. Tori // 37. Designed Decor

September 8, 2014

Gimme A F.A.L.L!


What does that spell?! FALL! It is almost here and I could not be more excited. Seriously, besides a full fledged blizzard winter, fall is my second favorite season. The leaves turn such amazing colors, the crisp air is so refreshing and it is just cool enough to wear a sweater. 

This month for the Silhouette Challenge the theme was Home Decor. As some may know, I am all about decorating. So for this challenge I really did challenge myself with something I've never done. That is building an object out of paper, as well I finally got the silhouette pens and the double sides adhesive. So this month is a melting pot of new things for me!Here is what home decor and a touch of fall looks like for me this year.


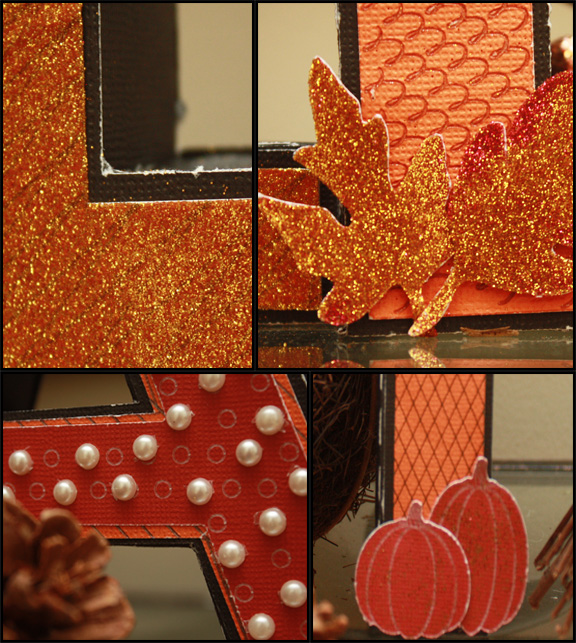
For this project to build the letters I used just regular colored orange and black textured card stock and my glue runner. I purchased the Silhouette designer edition from SVGtools and was given a credit to SVGcuts for $10. As soon as I saw these awesome letters I knew I needed them. Seriously, there are SO many projects that can be done with the letters, don't be surprised if you see them around again. 


I transferred the letters into the Sil program and the cuts are already line up to fit on a 12x12, they also have smaller sizes too. I watched the video on SVGcuts website to help me figure out how to put the letters together. It was extremely easy and took about 30 minutes to put all of the letters together total.

Next I used the sketch feature in DE(designer edition) to create lines inside the letters for sketching. On the A I used the rhinestone filler though to make little dots all over the face for a different feel. I have put off buying DE for years, I wish I would have done it much sooner. There are so many awesome tools in it! Next I used my black and dark brown pens and told the Cameo that we were using sketch pens instead of a blade. It drew them on just the same as if it was cutting out the letter. I love all of the different color options too.


For the little accents I used double sided adhesive and cut out two little leaf shapes and one of the L face fronts to cover in gold and red glitter. I really love how they turned out. It was also very simple to cut out and brush the glitter over. Mind the I attached the double sided adhesive to another piece of card stock that was cut in the exact same shape. it is much easier to work with complicated shapes this way.


Then I put everything together on our front table after finding my extra fall decor out of storage boxes in the garage. This project has been one of my favorites by far. It really took me out of a comfort zone with my paper crafting, but was very fun and exciting at the same time. As well the project was probably one of the easiest I have ever done too. I highly recommend the letters, why buy them at a craft store when you can make as many as you'd like at home!

I hope you enjoyed this months challenge. Have any comments or questions? Leave me a line below!
Also please take a second to subscribe and be updated on all the fun silhouette challenges, other projects and family life here on Home At Eight. Thank you for stopping by.

Want to Check Out More Silhouette Projects?

My Silhouette Challenge buddies and I are all sharing projects on our blogs today, so peruse the projects below for a wealth of Silhouette inspiration!


Our Sons & Daughters

Wood Shims and Word Art

Simple DIY Canvas Art

Pallet Signs

Chalk Paint Pumpkins with Fabric Leaves

Make a Personalized Scarecrow

DIY Wall Art for the Bathroom

Decoupaged Fall Leaves Lampshade

Gimme A F.A.L.L!

Eat SOMETHING

Sweet Baby Love Quilt Big Reveal

Sketching Inspiration for my little Dancer - September Silhouette Challenge

Family Feature Presentation Wall Art

Last Unicorn Shadow Box

Makin' my office a little more artsy fartsy

Family Command Center

DIY Grandparents Sign with Photo Frame

Dream Big Little Girl Canvas Art

Fall Pallet Sign {Grateful, Thankful, Blessed}

Pumpkins and Apples Sign

Handmade Freezer Paper Cloth Napkins


1. The Moberg Family // 2. Sandpaper and Glue // 3. American Honey // 4. Weekend Craft // 5. Grey Luster Girl // 6. From Wine to Whine // 7. Cutesy Crafts // 8. Practically Functional // 9. Home At Eight // 10. McCall Manor // 11. Dragonfly & Lily Pads // 12. Adventures in All Things Food // 13. Create it. Go! // 14. Please Excuse My Craftermath... // 15. The Outlandish Momma // 16. The Sensory Emporium // 17. My Paper Craze // 18. unOriginal Mom // 19. My Favorite Finds // 20. Architecture of a Mom // 21. Black and White Obsession //

August 30, 2014

Cutting The Cord: An update.

Another year has yet passed without cable and we survived! Very much a first world problem in todays society, one that I am ok with not having. I am positive that not having a bill such as cable helped us move to a city we have been planning to move for years, to go down to one income now, and do more family activities together.
Riding the golf cart around town and getting outside!

Since I wrote about our life without cable last year we have learned even more about doing things frugally. Learning to curb spending habits started with cutting our cable off and it has been more gratifying every time we find a new way to cut out more material objects. Which we know is not as special as time with loved ones. Now there is absolutely no room in the budget for cable and will never be a choice really, and my kids will live just fine without it.

 Even now in watching shows together we spend the whole time together, and mostly watching our daughters favorite shows on the PBS channel located in our Roku line up. Hulu has really upped their lineup of shows and movies too. As well we all know Netflix is on top of their game with shows like "Breaking Bad" and OITNB, some of our personal favorites for after baby is asleep. We get at least 2-3 mailers every week about how the companies can offer us cable for a year for lower and lower costs. They are personally wasting a lot of money and paper sending us those. The most impressive by far has been a large gift card, laminated, hard copy of a deal, it went straight to my toddler to draw on.
Doing just fine without the cable lifestyle. 

If you are still thinking that you may not be able to live without all the channels, give yourself a challenge when it is time to renew and try going without it for a month or two and see if it is really something you want to keep. Did you do more things as a family, is there another way to watch your favorite show. Just try it, you might surprise yourself.

This is an updated post from the original written last year, you can read it here. Any questions or comments on the cable free life? Comment below! - Alisha

August 28, 2014

I'm So Excited, And I Just Want To Share!


As you all know, we FINALLY got our Etsy shop open. At first it was just a few items, yet I am adding to it every other day and getting more and more ideas. I would love for any readers to share ideas with items that they like such as iron on transfers, designs you like, rhinestones, decals, all things are great. Now that the shop has been open for a week I want to pass on a Grand Opening event to you. Thursday starting at 8am EST through Sunday 12am PST I am doing a BOGO on any orders over $10 on vinyl decals. Super exciting, right?

I want to Thank You for the support that has kept me going with this blog for three whole years. I am so excited to be on this new adventure and will share a new vlog post this week about where I would like this blog to go and how it will intertwine with my youtube channel. So many exciting things are happening right now, it's good to share it with all of you. Below I will post the link to our Home At Eight facebook page explaining the details of the BOGO event. I hope you enjoy the designs and Thank You again for supporting us at Home At Eight.

-Alisha


August 19, 2014

We Are Open!!


Click to Shop

We have officially launched our Etsy shop. Home At Eight Designs. As of right now there are just a few things listed, life with a toddler can get crazy. I will be adding more every day this week and soon we will have a lot to offer. If there is anything you're interested in having made please just ask!

Right now on our facebook page we are having a giveaway of a 4inch Custom Monogram Decal to THREE people! All you have to do is "like" the post. That is all. Share with all of your friends too so they have a chance to win as well.

Thank you for all your continued support now and in the future. We are very excited to be on this journey. - Alisha & Daniel of Home At Eight


August 10, 2014

Something Exciting...


I have some exciting and new things going on here. And one of those items are that I am now an independent consultant for Usborne Books and More! I joined first because it is actually something that provides a fun activity for the whole family and not just myself. My daughter gets all the benefits of the product and I can make income for our family and have more time at home. This is something I am very excited about. The books are absolutely amazing and now Caroline grabs at least 3 a night to have me read to her. She only goes after these books now though, not even her others that she hasn't "read" yet. Anyways I wanted to let everyone know that I am going on this amazing journey towards promoting literacy. Hopefully this also means I will have much more time to make posts now. As well I will be posting videos about these awesome books and life in general. You can reach my Usborne site through this Link

If you have any questions or are interested in hosting a Facebook party just shoot me a comment or email. (alishalandreth@gmail.com)

July 14, 2014

Reasons I Love Daddy

  Yay! I am finally back on the Silhouette Challenge. It has been months, not intended at all. We have been moving into a new home and just getting life set up in general. This month's challenge is all about favorite things, between of course using the Cameo to make fun things, the project I did also includes my favorite people.


  Last month a majority of us surely celebrated Fathers Day and this year was my husbands second one. I wanted to make something super special that included my daughter in some way. I put down in words all of the things he does for her that shows her he loves her. She is one hundred percent a "daddy's girl" and you can really tell how much they love eachother.  Unfortunately I was not able to do a direct tutorial on this project because of time constraints and a one year old who wants to get at everything I am doing. But I can give a run down of how it was accomplished!

My supplies included:

  • White Premium Silhouette Vinyl
  • 10x10 Gallery Wrap Canvas
  • Ikea RIBBA frame 
  • Navy Blue Satin Martha Stewart Multi Surface Craft Paint
  • Masking Tape (Wide- used as my transfer tape)
  • Fine Point Tweezers
  • Silhouette Spatula
  • Hook
  • A One Year Old Toddlers Painting Skills


Ribba frame and canvas left out.
  I originally wanted to put words on a canvas and have my daughter paint over them and and reveal the letters through the paint. Problems were that the letters were too small and that they couldn't quite stick to the canvas as well. I believe I probably should have used something with more "sticky" to it or convered the canvas with mod podge first to give it some grab, I had time for neither though. Instead I let my daughter have at the canvas with the paint brushes and paint to let her create a one of a kind design. This is also means in toddler world to make sure and get as much paint as possible on the brush per brush stroke. It was a lot of fun for her though and she really enjoyed it, I enjoy that she got to help and it was not just a present that mommy made from "her". 
  I reversed the letters in the program and had them cut out backwards so I could adhere them to the glass of the frame. Using tweezers and the hook to weed the vinyl letters and the masking tape to pick them up. The spatula came in handy when placing the letters onto the glass, such as when the letters K, L, and I like to stick especially. After I was finished placing the letters, I simply put the glass back in the frame, used a little masking tape to hold the canvas to the back board and sides of the frame. Then I added the back on and used little tiny nails to hold it in place. Voila! The project was easy as far as skill goes and really made my husband smile from ear to ear. 

The canvas says:
         Daddy, I love you because...
          You give the best kisses
         Tickle all the giggles out
        Play peek-a-boo
       Cook me yummy food
      Teach me new things
     Go on rrrrides
      And love me for me.
                              - Caroline 2014
And of course when we gave it to him we added in that he is the BEST daddy ever and we love him so much. The "rrrides" we are referring to also is golf cart rides. Our amazing community has over 100 miles of golf cart paths to get around the town. She asks for a ride at least 4 times daily, we really prefer it over car rides now. Our little project now hangs in the hallway by the living room so we can see it every day and admire Caroline's handy work.

Thanks for stopping by and checking out our post. Now that my daughter naps on her own and goes to bed at a decent time (yay!) I should finally be able to join in these way more often. Have a happy summer!! Check out some more Silhouette Blog Challenges below and leave them some love. 


Want to Check Out More Silhouette Projects?

My Silhouette Challenge buddies and I are all sharing projects on our blogs today, so peruse the projects below for a wealth of Silhouette inspiration!


A Gift for the Bride-to-Be

Silhouette Challenge: My Favorite Things

My Favorite Things Keepsake Box

Printable Tattoos for Crafters & DIYers

Super Hero Backpacks

Geometric Two Tone Shirt Refashion

Instagram Paper Album

Reasons I Love Daddy

Ctrl Alt Del Pillows

Outside Decor: DIY Pallet Board Sign

Yo-Ho It's a Pirate Party

How To Use Silhouette Sketch Pens

Combining My Favorite Things, Baking and Crafting - July Silhouette Challenge

Pride & Prejudice Subway Style Art

Favorite Silhouette Challenge

Just umm, Let it Go

Temporary My Little Pony Tattoos

Mike Holmes Baby Onesie

Monogram It: A Memo Board Makeover

Super Room Redo

The Best Summer Ever Freebie and Tutorial

Summertime Toes

Crafty Girls Hair Accessories Holder

Watercolor Wall Art

Ice Cream Cone T-Shirt

Sun Fun Shirt

Family Wall Art: Scrabble Edition

Serving Tray Upcycle

Making Custom Rhinestone Designs

Etched Glass Coasters

Church Nursery Wall Quote


1. Just a Girl and Her Blog // 2. The Frill of Life // 3. A Time For Seasons // 4. The Thinking Closet // 5. Ginger Snap Crafts // 6. Grey Luster Girl // 7. Simply Kelly Designs // 8. Home At Eight // 9. Please Excuse My Craftermath... // 10. My Paper Craze // 11. Mama Sonshine // 12. Practically Functional // 13. Adventures in All Things Food // 14. Two Purple Couches // 15. Dragonfly & Lily Pads // 16. Sowdering About // 17. Cutesy Crafts // 18. My Mom Made That // 19. Pitter and Glink // 20. Pineapples And Pinecones // 21. Dream a Little Bigger // 22. McCall Manor // 23. TitiCrafty // 24. unOriginal Mom // 25. Persia Lou // 26. Lil Mrs Tori // 27. Home. Made. Interest. // 28. Sandpaper and Glue // 29. Silhouette School // 30. Creative Ramblings // 31. My Favorite Finds

February 24, 2014

Flower Power: A tutorial


  I am back with a tutorial on how to cut out a design with the Silhouette Cameo from iron on transfer paper. It is a very easy project and one that anyone can do, even with minimal Silhouette Experience. Unfortunately I didn't get to finish the project as little miss Caroline woke up, I will share a similar finished product later with her birthday photos.


  Throughout these photos I will show you how to group your items and get them to the cut out point. Then you would simply follow your iron on transfer instructions.

When you are done with placing your design elements, select all of the items together in that grouping and use the group selected shapes. 
Next I placed my letter into the group and moved the shapes into place to make one large grouping. Then I selected all of the items together and grouped them.
Next select the Offset tool and choose the offset button with a "round" corner to the shape. I wanted it close but to still have a small outline when it was being cut.  Then make sure to select both the shapes (outline and design) and group them together. 

Go to the cut properties and select cut edge. You can now see where the outline is around the design. 
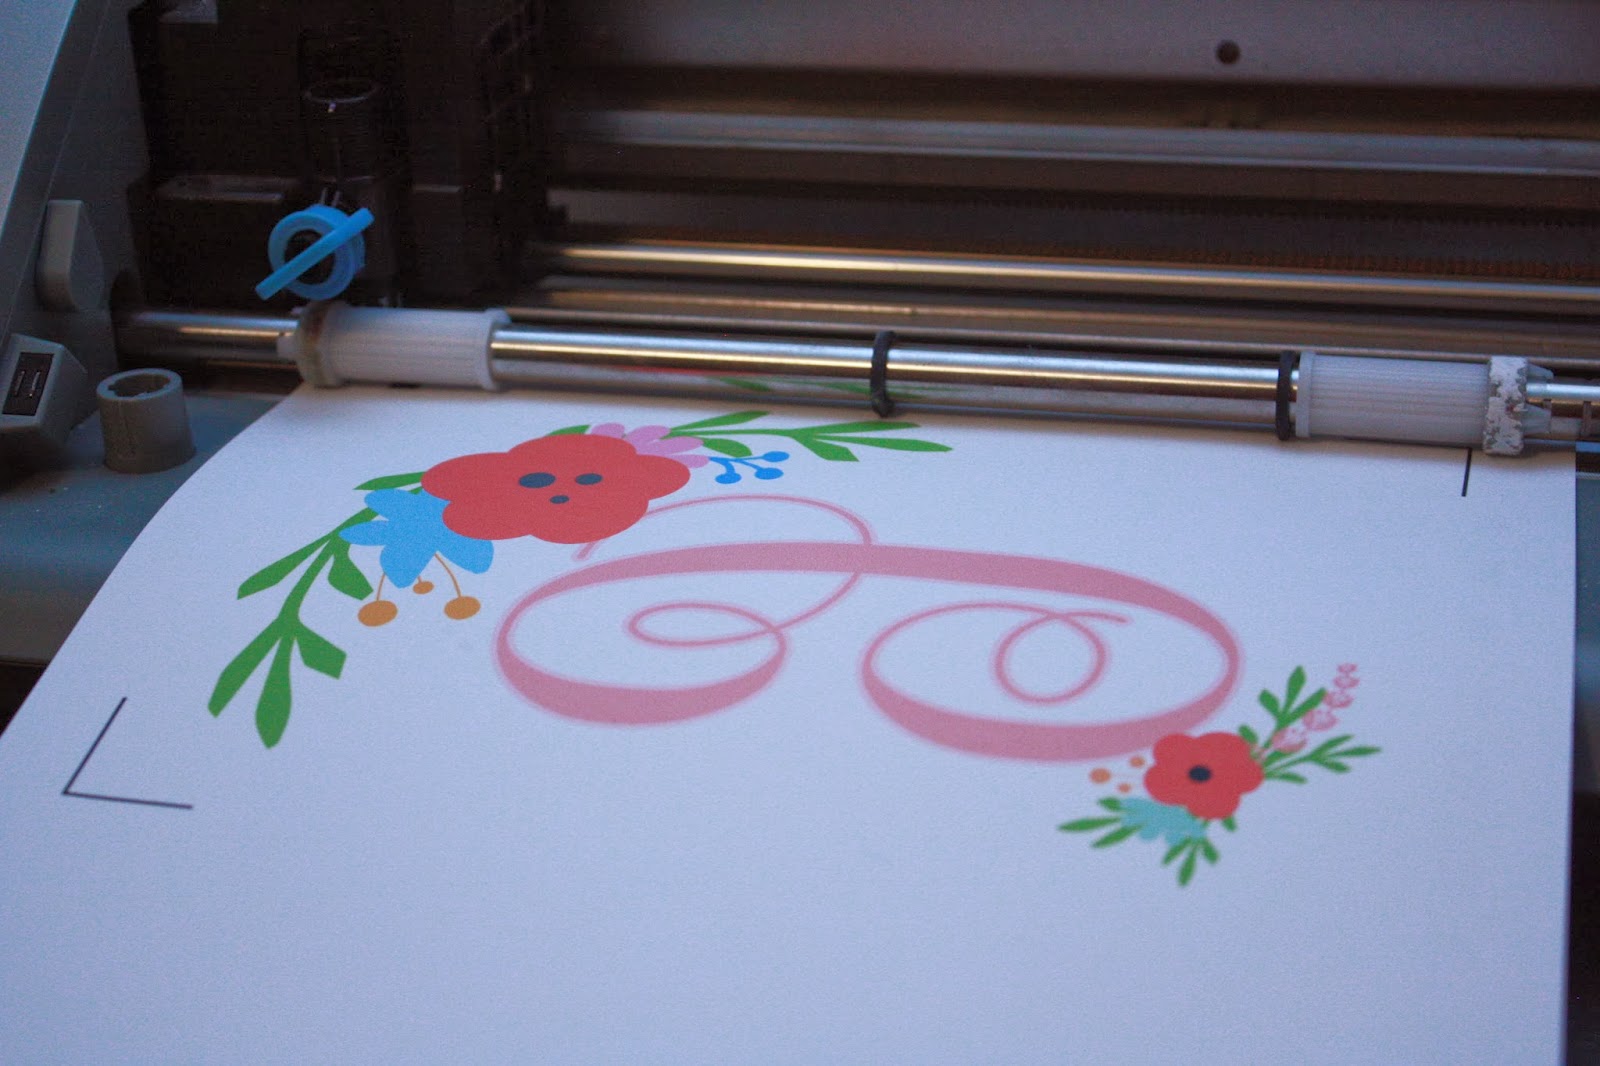
Next you will need to mirror your image to the left. This ensures that when you print out the image on the transfer paper and cut it, that it will show up correctly when it is applied to the fabric.
Now turn on your registration marks so that the Silhouette can detect the image to be cut. I made my area about 5x7 to only use half the paper. Just make sure your image is inside the red box.  The cutting settings I used were for custom media, since there was no cutting mat. Thickness of 4, speed 3, the blade was set at 7 and with the double cut feature turned on.
Turn your rollers to the 9inch (first notch), or smallest setting on the Cameo for cutting. I did not use a cutting mat with this project. To load the paper select Load Media on the Silhouette machine menu and then ok. 
Now you can press cut and let the machine do it's magic. Make sure it tells you it that it is detecting the registration marks. 

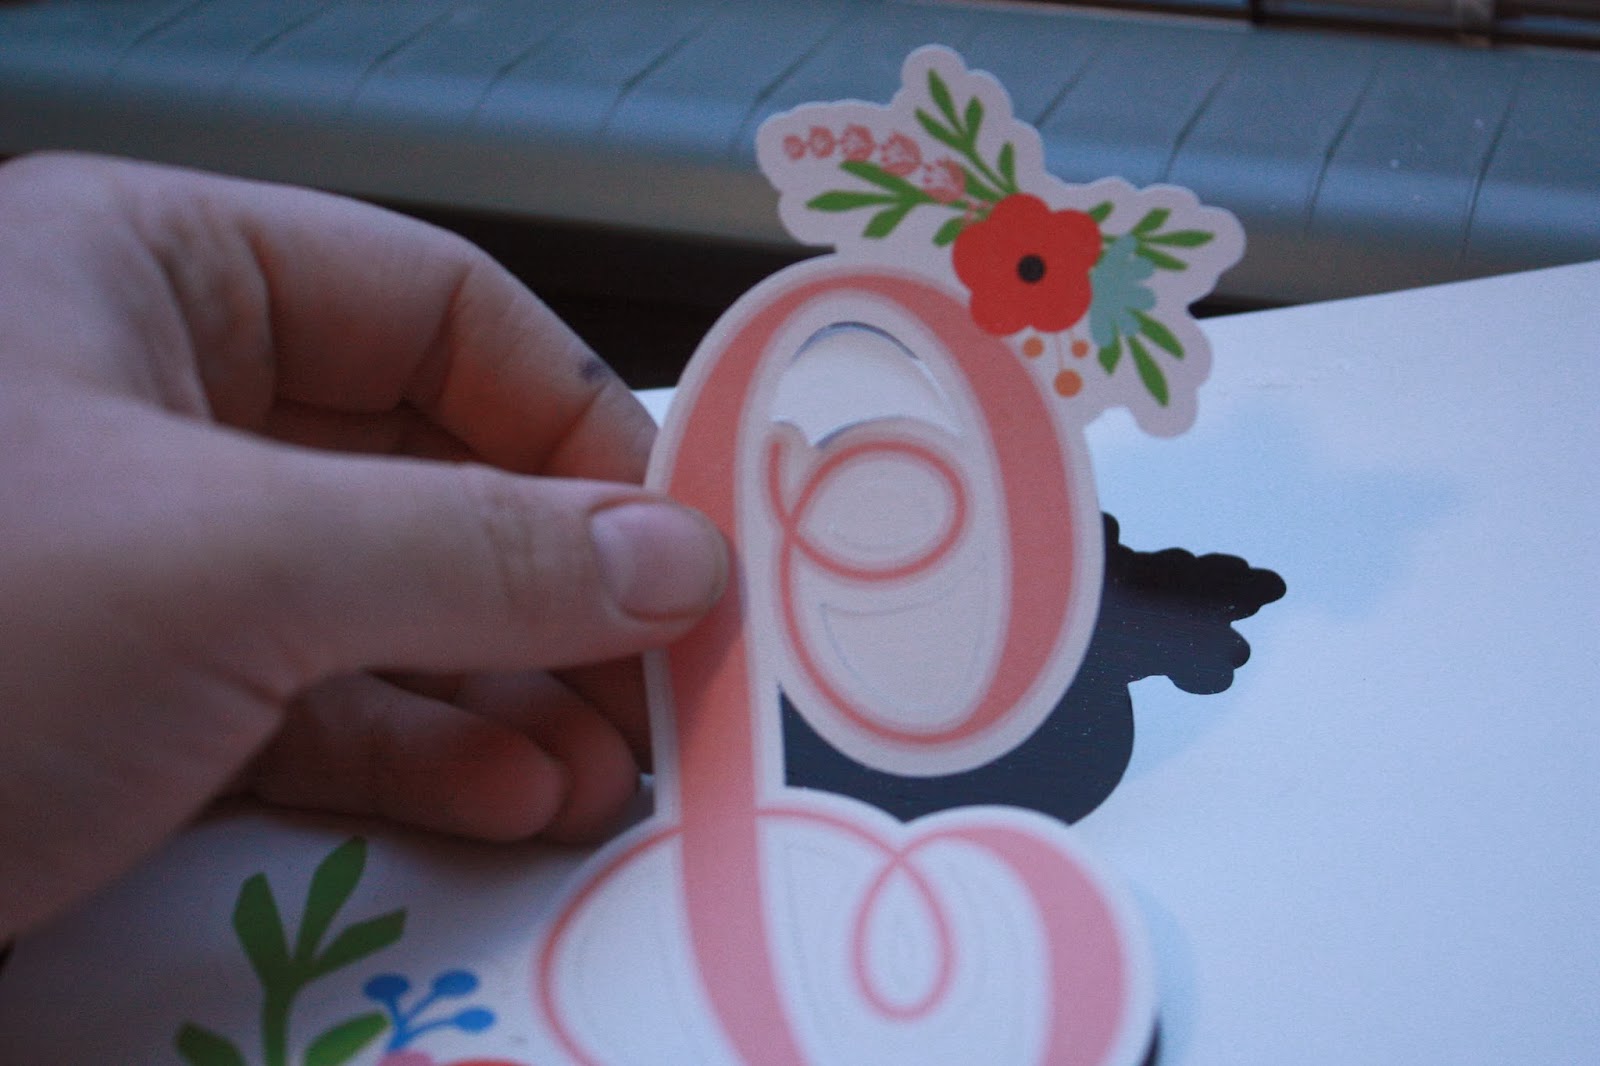
Now you can pop your image out of the transfer paper. Be careful and go slowly. You do not want any extra tears on the paper.

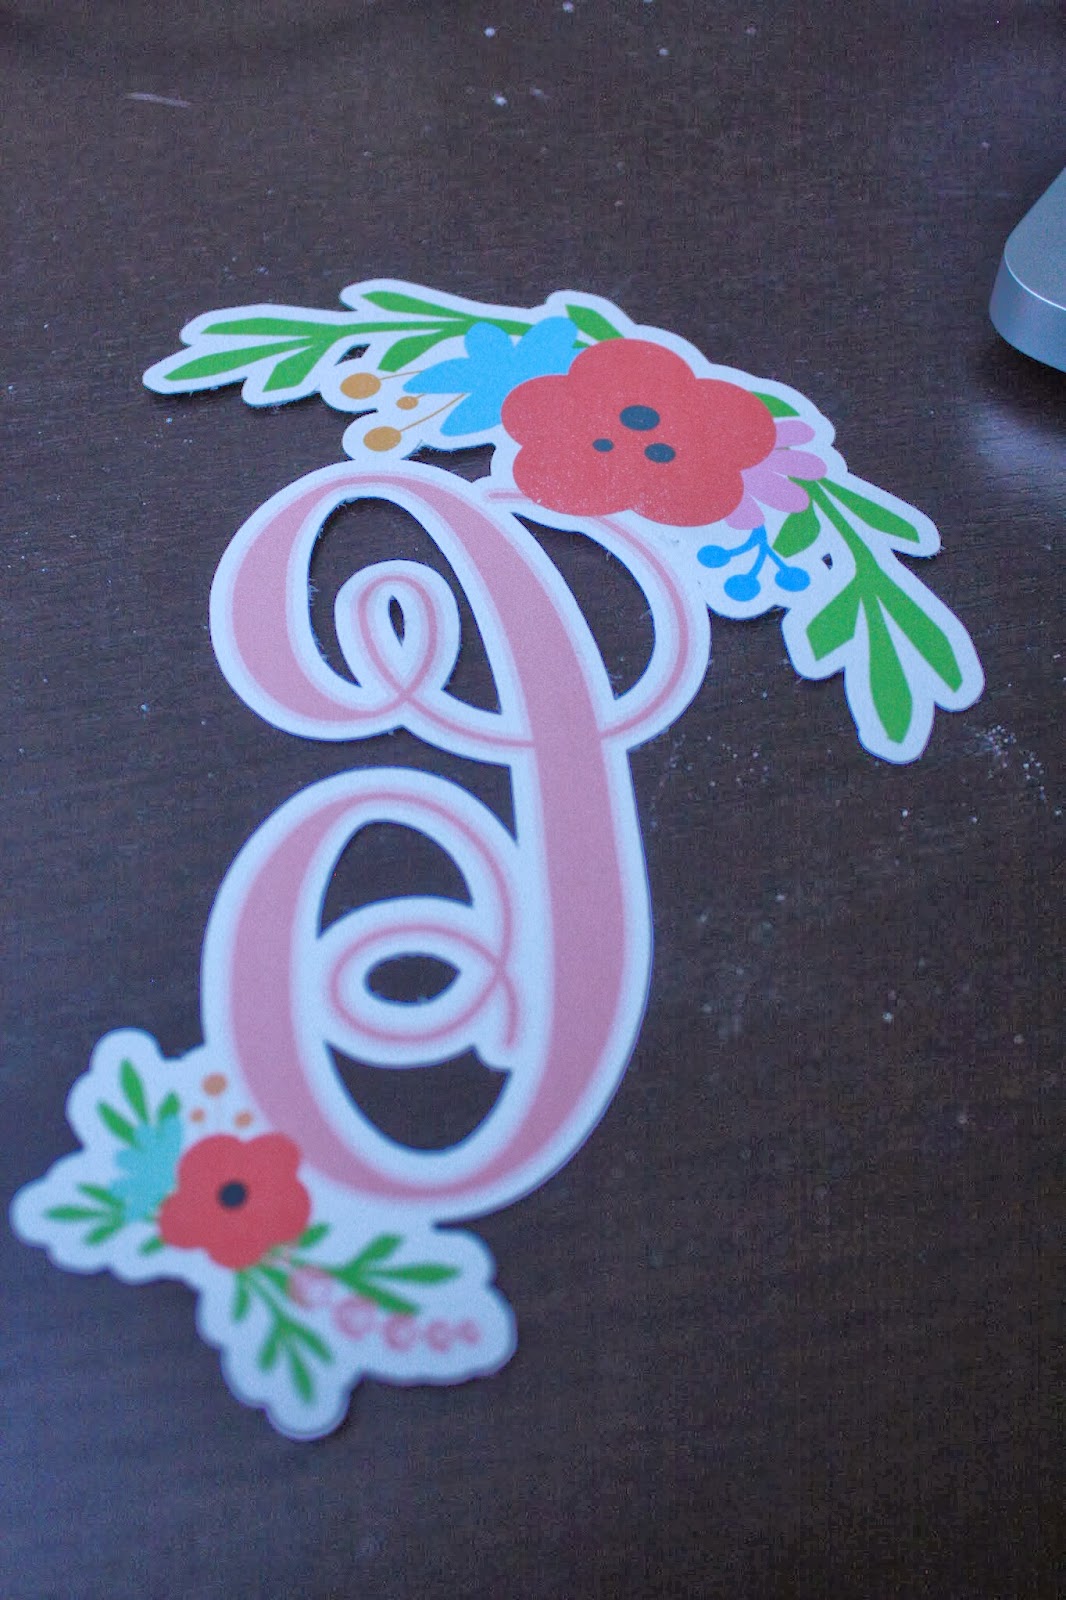
 The finished cut out!! Now turn it over and follow your product instruction to iron it on to the fabric.
I made a birthday shirt for my daughter using this technique and will be taking photos of her soon. I will post these as soon as I take them. I hope this tutorial helps you with learning a little more about using your machine. Feel free to ask me any questions that you may have about this tutorial or other features of your Silhouette! Thanks and Enjoy.