The Mudroom
Part I
 |
| PIN IT |
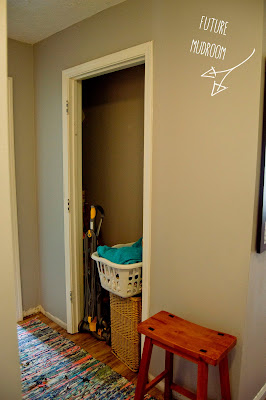
This space has been in the works for quite some time. We have planned over and over again what we wanted to do with it, finally coming to fruition with a real plan. From the beginning we always knew we wanted to open up this closet and make it an actual use able space. See, this little hallway has several uses in our life; laundry, bathroom, and storage. But this closet had a door in the middle of it and is very narrow and long. It made no sense to me. We wanted something open with real storage purposes, and not another closet where things will be stuffed into the abyss of the dark. I am don't like digging around in small, dark closets. We want a cute little mudroom type space to store our shoes, daily coats, and other items.
 |
| Laundry| Bathroom| Storage |
For months we have said over and over that we would start on it "this weekend", just to be busy with other projects. Well, we finally made a headway on it. And now that it has started, it has to be finished. It always helps to get the project initiated somewhat so that you just can't stand to look at it.
Our first point of business was to see if this wall was a supporting wall, and even figuring out how to spot such a thing. We are pretty sure it is not, since the beams are running parallel to the wall and not perpendicular. We only want to open it slightly on each side of that door way to the next stud in the wall. That way it leaves some room in the sides for cubbies to be used for shoes and storage baskets.
What finally happened to begin the project was that our oldest daughter wanted a new bed frame that was shorter, I can't blame her. Getting into bed every night using a step stool and having to use a bed rail is not always that fun. Especially when you are pining to be a big-kid in every which way you can be. So we agreed, sold her old bed frame, and bought a new one that meant she could get in and out easily and get rid of that rail. The problem then became ours, what do to with her old box spring. There is just nowhere to store this thing for 3-4 more years until possibly when the baby will need it, and by then we will buy her a mattress and probably the same bed frame without a box spring.
So I cut the backside of it open, and low and behold it's all just a wood frame with some strong cardboard on one side. It was also the exact sizes of wood that we needed. So we decided instead of going to the store to buy the wood, we would just re-purpose the box spring frame and use it for the mudroom. The idea was to create a bench, and place on the wall board and batten going up the back, along with a shelf at the top. It's very doable, but time consuming. So hubby got to work taking apart the box spring one night, while I fed the baby and watched him hard at work. Believe me, I usually am the first one with the hammer out and taking things apart, the baby is keeping me pretty grounded lately.
The best part about using the frame of the box spring was that the bench seats were basically already built. We only had to cut a half inch off the ends and screw them into the studs in the wall. We will be building leg supports underneath the seat as well to make sure everything holds well. The other slats from the box spring we are using for the board and batten boards on the wall and screwing them directly unto the studs in the wall as well. We are "cheating" our board and batten since our walls are flat and don't really have any texture on them, it makes it easier and more budget friendly.
We plan to finish the project for the most part this coming weekend. I am sure it will evolve over time as we find what we truly need for storage and how it will work for us. We are just so excited to be transforming our home just how we like it!
Are there projects in your home that you take months to get started? What are they? I would love to know some things you are working on. - Alisha


No comments:
Post a Comment