November 30, 2017

Deck the Halls...


It's here! Our crowning glory to our living room, our faux mantle. Ever since we moved into this home we have thought that the living room really was meant to have a fireplace on the far wall. Low and behold, the other homes in our area that are similar to ours all have fireplaces on that exact wall. So we knew our gut feeling was correct, yet currently we weren't in a position to be adding an actual fireplace. We both love the look of a mantle though and kept our eyes peeled for months on end.

I happened upon a beautiful mantle on Facebook Marketplace, and at a price I could stomach. We knew we would have to add to the mantle to make it work in our space. We met with the woman selling us the mantle, who I have to say was one of the nicest people I have ever met. I have to give a shout out to her here because she told me a ton of information about goats that was extremely helpful to us. We plan on getting some goats in the next year or so, after a fence is built.


Anyways, this mantle really caught my eye and was absolutely perfect. We cleaned it up, sanded it down a bit, painted it again, and added a piece of plywood to the middle that I painted to look like shiplap. Yes, we are “Fixer Upper” fans, and actually do like the look of shiplap.  Originally we wanted to put faux brick textured wallpaper on the plywood, to give a feel of a real fireplace, yet I couldn't find any locally and everything online just wasn’t affordable or looking like what I wanted.


We used a satin interior paint to go over it twice. And our favorite paintbrush, the Wooster 2inch angle Sash brush. Seriously, get yourself one, here's a link 

smooth plywood piece 48"x48"

I painted over it twice with the same satin paint. 

I measured every 8 inches and used a straight edge and a gray colored pencil to create the lines. 

Next fall we would like to get bookshelves to go on each side of the mantle and build it out so that there is depth and an actual inside space. At that time we will either figure out a brick facade or tile look to add and make it have more of a real feel to it. Which in turn will add more character to the house and storage space. It’s a win-win situation, one we are very excited to do.

We attached the mantle using something called a cleat system. I searched the best ways to attach something like this to the wall and found quite a few people use it, yet they build one with wood. Since we currently don’t have the tools or space for wood working as such, I set out to find something pre-made that we could purchase instead. I found a metal one typically used for hanging mirrors that could hold up to 300lbs, this one is by a company called Hangman. The mantle maybe weighs less than 40lbs total, but we didn't want to take our chances with another system as well as something that was long enough to go across the back of it and keep the weight even. Essentially this cleat is keeping the mantle leaning against the wall in an upright fashion and keeping it secured. Seriously, this thing does not budge.


The plywood attached to the back of the mantle.

We connected the cleat system to the top of the plywood since it was the piece that stuck the furthest out from the piece. 

Once we had it attached to the wall we saw that there were some good sized gaps on each side of the mantle and wall. We already had some gaps between the inset plywood that we needed to cover up as well. So hubs went to our favorite home improvement store and found some wood trim that blended in really well with the style. Honestly, you cannot even tell that it doesn't belong to the actual piece.

See that large gap between the plywood and mantle? Hubs is drilling holes here to attache the trim. 
Finally attached to the wall and the trim pieces added to cover the gaps. Looking beautiful! 

All in all, this project was very fun to do and oh so satisfying. It feels like it was always meant to go on this wall. Even though we will be adding more features surrounding it in the future, it still has an elegant touch to it. We love that we have somewhere to hang our family stockings for Christmas this year and something else to decorate the rest of the year.


Are there any projects in your home that you always felt like it needed to pull it together? Something you knew always belonged there? Let me know! Leave your blog link below too so I can see it. Thanks for reading! - Alisha

Like the stockings we have? We got them from Target, check out this link to them here and grab some for next year. They hold a lot of goodies from Santa. ;)


PS: All products in this post were purchased on our own, our suggestions are just that, suggestions for what we used and liked! 


October 20, 2017

Good, Clean, Fun!

The Mudroom 

Part I


PIN IT


  This space has been in the works for quite some time. We have planned over and over again what we wanted to do with it, finally coming to fruition with a real plan. From the beginning we always knew we wanted to open up this closet and make it an actual use able space. See, this little hallway has several uses in our life; laundry, bathroom, and storage. But this closet had a door in the middle of it and is very narrow and long. It made no sense to me. We wanted something open with real storage purposes, and not another closet where things will be stuffed into the abyss of the dark. I am don't like digging around in small, dark closets. We want a cute little mudroom type space to store our shoes, daily coats, and other items. 
Laundry| Bathroom| Storage


For months we have said over and over that we would start on it "this weekend", just to be busy with other projects. Well, we finally made a headway on it. And now that it has started, it has to be finished. It always helps to get the project initiated somewhat so that you just can't stand to look at it. 
Our first point of business was to see if this wall was a supporting wall, and even figuring out how to spot such a thing. We are pretty sure it is not, since the beams are running parallel to the wall and not perpendicular. We only want to open it slightly on each side of that door way to the next stud in the wall. That way it leaves some room in the sides for cubbies to be used for shoes and storage baskets. 

What finally happened to begin the project was that our oldest daughter wanted a new bed frame that was shorter, I can't blame her. Getting into bed every night using a step stool and having to use a bed rail is not always that fun. Especially when you are pining to be a big-kid in every which way you can be. So we agreed, sold her old bed frame, and bought a new one that meant she could get in and out easily and get rid of that rail. The problem then became ours, what do to with her old box spring. There is just nowhere to store this thing for 3-4 more years until possibly when the baby will need it, and by then we will buy her a mattress and probably the same bed frame without a box spring. 


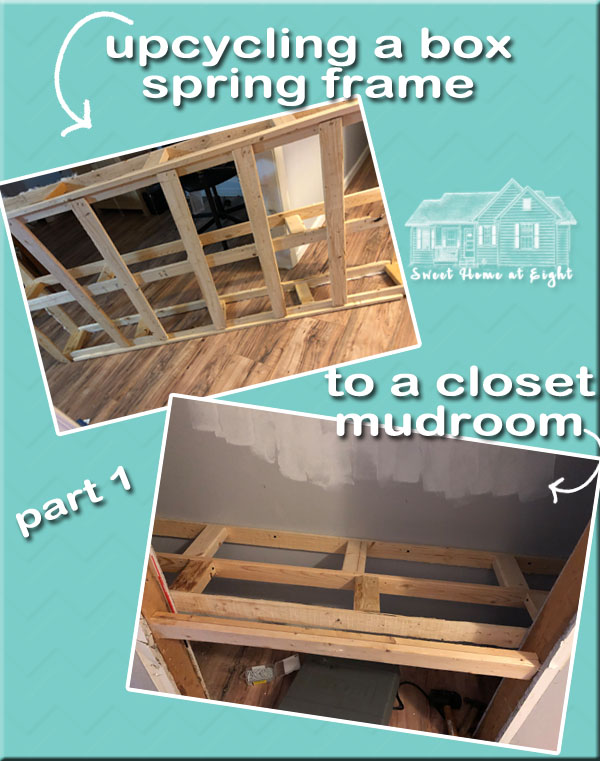
So I cut the backside of it open, and low and behold it's all just a wood frame with some strong cardboard on one side. It was also the exact sizes of wood that we needed. So we decided instead of going to the store to buy the wood, we would just re-purpose the box spring frame and use it for the mudroom. The idea was to create a bench, and place on the wall board and batten going up the back, along with a shelf at the top. It's very doable, but time consuming. So hubby got to work taking apart the box spring one night, while I fed the baby and watched him hard at work. Believe me, I usually am the first one with the hammer out and taking things apart, the baby is keeping me pretty grounded lately. 


The best part about using the frame of the box spring was that the bench seats were basically already built. We only had to cut a half inch off the ends and screw them into the studs in the wall. We will be building leg supports underneath the seat as well to make sure everything holds well. The other slats from the box spring we are using for the board and batten boards on the wall and screwing them directly unto the studs in the wall as well. We are "cheating" our board and batten since our walls are flat and don't really have any texture on them, it makes it easier and more budget friendly. 


We plan to finish the project for the most part this coming weekend. I am sure it will evolve over time as we find what we truly need for storage and how it will work for us. We are just so excited to be transforming our home just how we like it! 

Are there projects in your home that you take months to get started? What are they? I would love to know some things you are working on. - Alisha

September 13, 2017

It's Getting Hot in Here...

This post is about our personal interaction and opinion when having to replace our water heater with a home warranty program. I will not name the company we used, as well all views are our personal experiences, I understand not everyone experiences things the same way. 


When we first came to inspect this house we noticed something very quickly, the water heater. It was OLD, for an appliance, it was very old. Twenty-eight years old to be exact. That is quite an age for a water heater, it is older than the house is actually. But of course since it was still in working order, the owner did not want to replace it when we requested it. We were anticipating it going out pretty quickly. Instead, the previous owner agree to buy a home warranty for us that would last the first year and cover the cost if it was to go out. We were happy with that agreement and thought it would be easy enough.


The beloved dinosaur of a water heater...


Right around the second week of August, suddenly the hot water was gone. Now, if it was just us two adults we really wouldn't be too bothered. With two kids, this is a whole different story. As well it happened to be our birthday weeks too, so birthday plans went out the window so we could figure out what plan of action we wanted to take.

We looked up our home warranty contract again to make sure it would cover the replacement cost of the water heater, as it said it did. So we went online and made the service call and paid the $75 fee, this was all on a Sunday evening. We really thought that we would get a call the next day and maybe someone would be out to confirm it was broken and just switch them out. Everything works out in your head the way it should, right?


Yep, not so much. We got a call on the Tuesday that week, that someone would be out between 1pm-5pm. When you have two little kids and a dog it can get difficult waiting around for someone to show up. That same day it also started raining, so I really thought the whole thing was down the drain for the day. Especially since the water heater is under the house. Finally 5 PM rolled around, still no one had showed; at around 5:10 hubs messaged me that someone was on their way. By 5:30 PM they were at the house and quickly went to inspect the water heater.

As suspected it was busted and leaking, and yes, it would need to be replaced. But here is the kick us while we are down part, it would cost us and extra $525 to have it installed. The home warranty only covers the labor cost and price to install the new one. We were now at the mercy of the plumbers who decided we also needed all new plumbing and to add a reserve tank on the side. The state put a law into place for any homes built after the year 2001 for all water heaters to have an extra tank on them. Our home was built far before this and it is an optional item. But, the plumbing company is allowed to say they cannot install it without the tank and any other parts or pieces they see fit.

This was all very frustrating for us and we felt really upset that what we expected to happen was not at all. Hubs called the warranty company and for a second opinion we would have to pay for it ourselves or just fork out the extra $525 to have this company do it. And even if we decided to go with them, they said the might have it to us by the weekend or early the next week. I do not enjoy having to boil water for any dishes or baths for the kids to have a warm bath, or taking ice cold showers. Although we had a small emergency fund started, it wasn't enough to cover all of that in good conscious. We both knew that a new water heater is only around $300 and a little extra plumbing work. So we decided to cut our losses on our $75 and just do it ourselves. So on Friday morning of that week and my birthday, hubs went to Home Depot and picked up a water heater and some plumbing fixtures after checking out what he needed. It cost us about $340 to do everything ourselves.


All in all, this experience left a sour taste in our mouths to do with home warranties for now. Not to say they don't help many people. I could see it working if you have an appliance inside the home that needs to be replaced or repaired, and no extra work needs to happen to do that. But for now, I cannot recommend they are quite worth the time or money. If you have a choice, do your research and find others reviews on the company also. Even call and ask the company their policies on item replacements. I wish we could have had a little more say, but sometimes that is just the way things do. Have you ever had a warranty company replace an item? Was it an easy process for you? Do you often DIY the project instead? Leave any comments below, I would love to know others experiences. - Alisha

August 21, 2017

Lighten Up!


 If I were to tell you one of the reasons we chose this house was for the kitchen, you probably won't believe me. But it is the truth. We wanted a home that we could put our stamp on and make it what we truly wanted, and not pay the hefty price of someone else having done what they wanted first.
PS: Those appliances are long gone and changed out. I will share some after photos on the about the house page.

Soak in all the glory that is 25 yr old oak cabinets, brass knobs, and white laminate counters that every stain on them stays for a while just to make you feel a little crazier than the day before. You can scrub with bleach all day, they just want to see your pretty face.


Well, it will be a while before we can replace these cabinets and counters. There are other projects that cost a little less that we want done first. For months though since we have been here I have been looking at this tiny, useless "cabinet" above the sink. Literally, nothing could go up there, it's too high up for me to reach and the cabinet board was very flimsy. The only point of it was decoration in the original kitchen when it was popular. This cabinet has been an eyesore to both of us. We hadn't quite planned what we were going to do yet with it, but this weekend it was on a whim that we just wanted it gone. So wonderful hubs got out the drill, and set to work. It took all of five minutes to pull that thing down. We both wondered why we waited so long, it should've been done after we moved in.

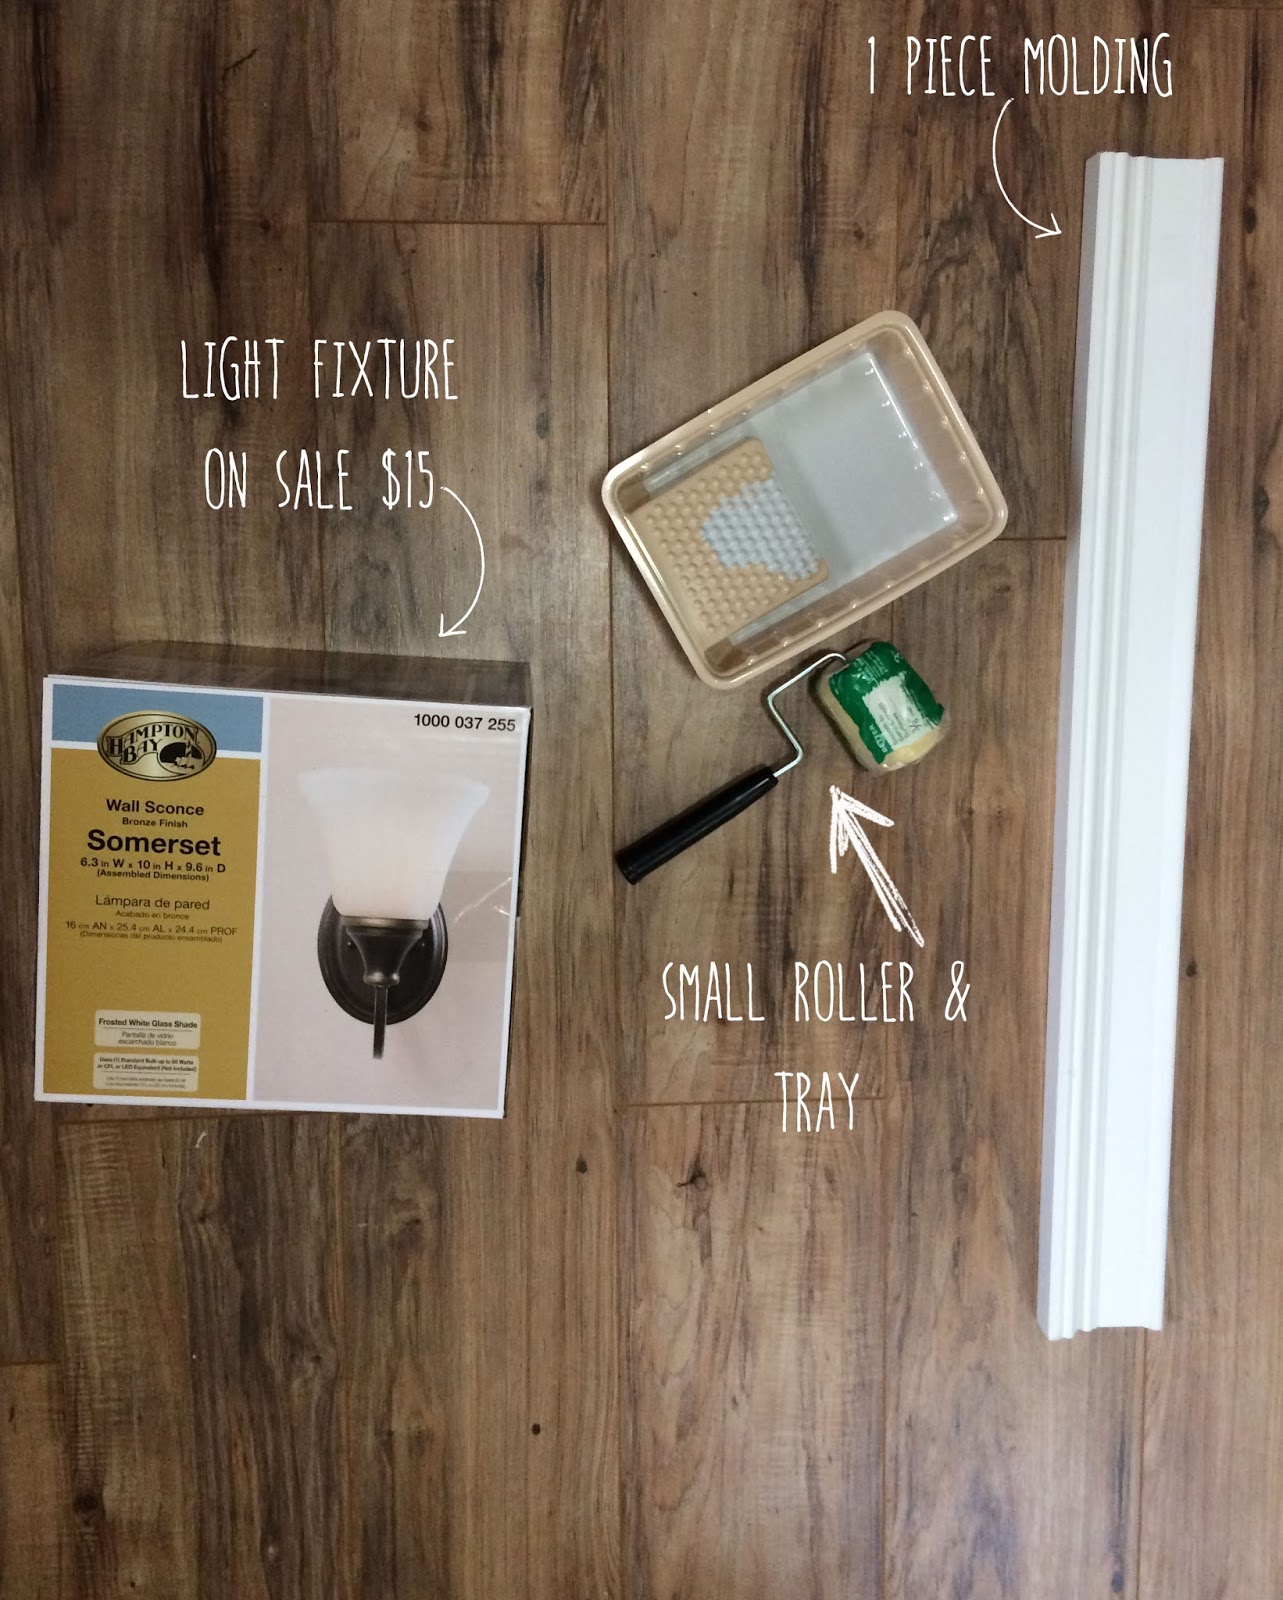
We set out to Pinterest to look at some ideas for what exactly we could do above the window. There was electric wire already hanging out of the wall that was connected to a florescent light under the cabinet. That was not the type of light we were hoping to have in this space. All we knew was we wanted it to be easy and make it a wall mounted light so there wouldn't have to be any re-routing wires through the ceiling. So we settled on a sconce type of light that would go perfect in that spot.


Hubs had some items to return to Home Depot, so we used that same amount of $30 to do this little upgrade. Even with such a small budget, this project made a world of difference in this blah kitchen. We had our grey paint still leftover from when we painted the house. We used Gliddens DUO No VOC paint in Pebble Grey. As well we had white ceiling paint to cover the area above that hasn't been seen for many years. It was covered in black soot just from being in the kitchen.


Lots of yummy grease and residue on the inside. 

Hubs turned off the breaker for the electricity before removing the cabinet. It was attached with a few wood screws on each side and in the top. After removing the screws it only took a little wiggling for the whole thing to come out.


Next we painted the dry wall and ceiling with our paint. Hubs hooked up the light following the instructions for installation and we added a piece of trim above the window to really finish the area off.


Day view! Don't mind the little bit of uneven painting at the ceiling line. Crown molding is being added later. 


Night time! Look at all that glorious light! 


This project gave a tiny upgrade to this space and made everything feel taller. Every time we look at it we love it even more. As well, I can finally see better when I'm doing dishes at night, or when I give the baby a bath in the sink.

Are there any projects you've done in your house on a tight budget? Did it make a huge difference to you? Thanks for reading! Leave a comment or question below. - Alisha

August 12, 2017

Big Changes

Wow! It has been quite a while since I last wrote. Life took over for us and that is really all I can say. We have finally settled back down into a place that I can share about life a little more now.


First if you're a long time follower, you may notice that we changed the name of our blog. I didn't renew my domain for HomeAtEight in time, and well a company bought the name quickly and it is much too expensive to buy it back. I wasn't sure at the time where we were headed in terms of our future housing, so I also wasn't positive about what kind of blog I would be writing about.

Well, last December we were in a spot to finally buy a home here in Georgia for ourselves. It felt like a whirlwind, and at times everything felt like it was going wrong. But, we ended up in the first house we really fell in love with and it all fell right into place in the end. This home is a little country cottage style, exactly the kind we wanted. It needed some love put into it and that is another quality we were looking for this time. In Oklahoma we had the brand new home, built from the ground up and had everything we chose for that house. We absolutely loved that home, but we both knew we wanted a home with more character, land, and plenty more trees. This little abode has all of the things we were searching for and potential for more down the road.

Closing day


Another REALLY big change in our life was that we welcomed another baby girl to our family, completing our dream for ourselves. We found out we were pregnant right after I had come back from a trip to Oklahoma to shoot a wedding for a close friend. I really had thought we had missed that month, but lo and behold she just waited a few extra days to let us know she was there. The same day that we found out all of our financial funding was approved for closing, we found out that baby was another girl. We couldn't have been more excited to give Caroline a little sister. Daniel was even more excited as he absolutely loves that he has two girls and got to give our new sweet Eleanor a middle name after his grandmother that he was very close to, Hope.

Now here we are, months later from closing day and ready to share what we have done so far to our home, as well as our future projects we have in mind. Much of what we did was done right away and now we are planning for the really fun stuff to put our spin on this little cottage. Follow along with us on this journey! We are so excited to be back again. - Alisha


PS: Did I mention I enrolled back into school last year? I changed my major to Library Sciences and am on my path to gain my MLIS (masters) to become a librarian with a focus on history. I could not be more excited for what our future holds!

July 13, 2015

Summer Cards

Hooray! I am back for a very, LONG awaited Silhouette Challenge! This months theme was "Summer", what a lovely tone to set for the next few months. For the challenge I decided to make a set of five cards that have to do with items you usually see during the summer. I had a lot of fun making these and am so glad I participated this month.


I used my Cameo, the Silhouette pens, watercolor paper, and my watercolors. First I designed the cards to a point through both photoshop and the Silhouette program. I used the Cameo to do a kiss cut, where it does not cut all the way through the paper, rather just marks the top.  This adds a nice texture to the designs. Then I used the pens and my watercolors to finish the rest.

My settings used to cut the watercolor paper (105lb paper) were a blade setting of 1, no double cut and thickness of 33 for the kiss cut. The full cut for the rounded edges was blade set at 7, no double cut and same thickness of 33. Throughout the kiss cut process I would pause the cut and clean out the blade housing so it wouldn't be too clogged.


The set of five have a starfish, salt water taffy, snow cones, the words "Relax" & "Sunshine".


For the "Sunshine" card I used the kiss cut for the lettering, I could never do that kind of font freehand. Then I colored in the letters with the Yellow Glitter Silhouette Pen. As well I drew and the sunflowers and used water colors to paint them in. This is one of my favorite cards out of the set. 


The starfish card was made from a clip art starfish I found on google and used the trace feature to find the cut lines. Preceded by some very simple water colors to add depth and texture.


This salt water taffy card was something that really reminds me of summer. We just spent a weekend at the beach and these wonderfully delicious candies were fresh on my mind. I used a photo of the candies that I took and traced all the edges and curves in photoshop. Then I transferred the images to Silhouette and used the trace feature to create a cut line. These really say "summer" in an inviting and nostalgic way for me. 


This was actually the first idea that came to mind for me after reading the theme for this month. I pictured someone laying on the beach, letting the sun wash over them as they listened to the waves come into shore. It probably helps that we also have a sound machine for Caroline that has an ocean setting. ;)  The yellow watercolor was used around the kiss cut words to create a happy, sunny vibe. Inside of the word RELAX, I painted a small scene of a wave washing on shore, creating the foamy white layer and turquoise ocean water, coming over the soft sand. Just talking about that makes me feel completely relaxed.


And lastly, we have a snow cone. Summer is full of these guys, especially when you have kids in your life. Or even if you are a big kid at heart. I used my photoshop to create texture using a filter of an ocean ripple. Then I transferred the image into Silhouette and used the trace feature for the snow cone top, as well I created the cone with the polygonal tool. I sent it through the cameo for the kiss cut, and voila! You have a snow cone, with wonderful texture. The blue, red, and purple water colors mixed nicely to represent all the wonderful flavors. And what would a snow cone be without dripping some on the ground from the little paper cone cup?

I hope you enjoyed these cards! I really enjoyed making them and feel like I have hit a new wave of inspiration for some projects. Thank you for checking out my Silhouette Challenge and share some love with others who joined this month too!- Alisha


Want to Check Out More Silhouette Projects?

My Silhouette Challenge buddies and I are all sharing projects on our blogs today, so peruse the projects below for a wealth of Silhouette inspiration!

Summer CardsDIY Fringe Beach Cover-UpSummer Burlap Wreath with Chipboard InitialDIY Tribal Summer Love Shirt with Glitter HTVMason Jar Monogram T-Shirt with Free Cut FileSummer Jar LightDIY Painted Anchor Beach Candle HolderPatio Door WatermelonsPersonalized Shower CaddyHow To Tie Dye A Shirt With Spray Tie Dye!Summer Memories JarFAUX SEA GLASS DECORATIVE JAREtched Monogrammed Mason Jar MugDIY Zip Code Pallet Sign
1. Home At Eight // 2. DIY Just Cuz {Sam} // 3. DailyDwelling // 4. Where The Smiles Have Been // 5. My Paper Craze // 6. Get Silvered // 7. DIYJustCuz {Brittany} // 8. Whatcha Workin' On? // 9. The Stamp Doc // 10. Practically Functional // 11. Simply Kelly Designs // 12. Patina Paradise // 13. Architecture of a Mom // 14. Weekend Craft